
How to set the printed store name
The store name on printed documents is automatically retrieved from store information by the system and does not need to be manually filled in the print template.

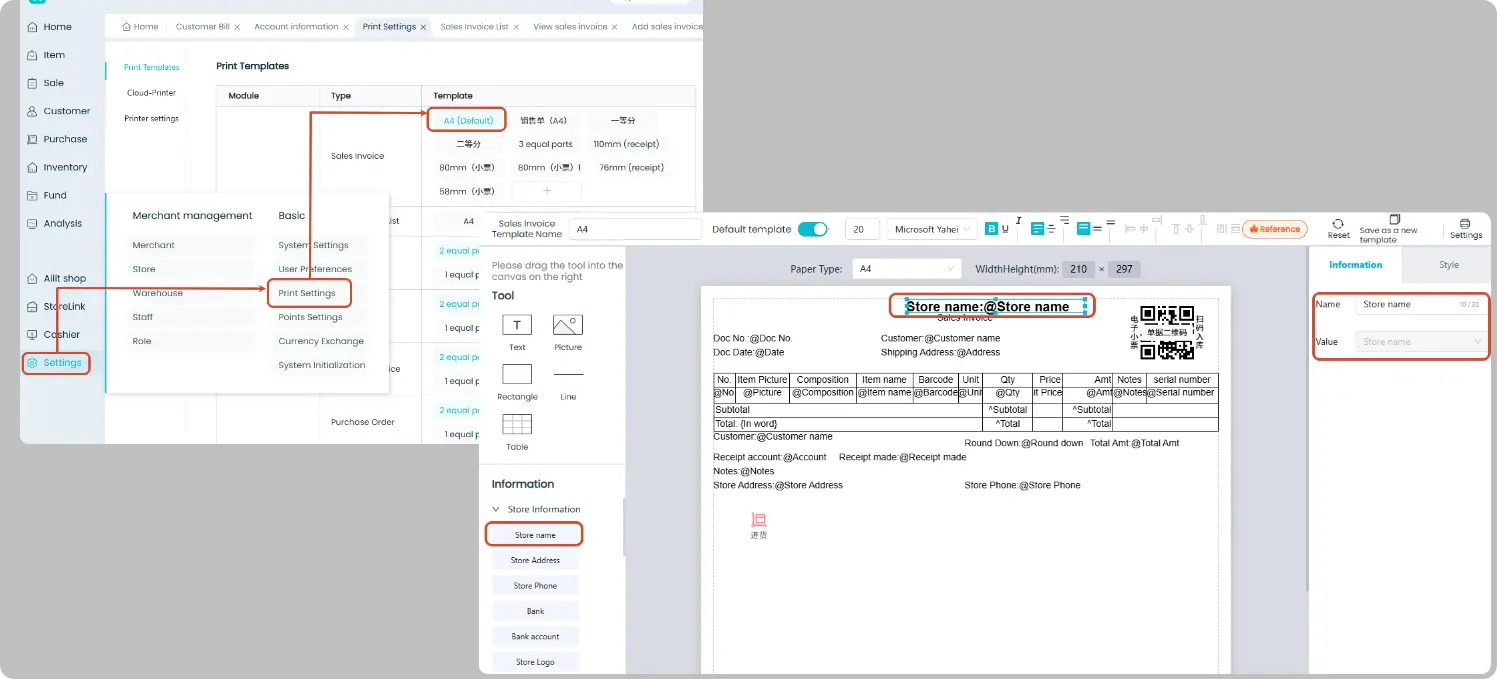
Print Template Settings
Path: [Settings] → [Print Settings] → Edit Print Template
The template comes with the "Store Name" field by default. If it is accidentally deleted, you can drag and add it from the component library on the left.
This component automatically retrieves the name from store information without manual input.
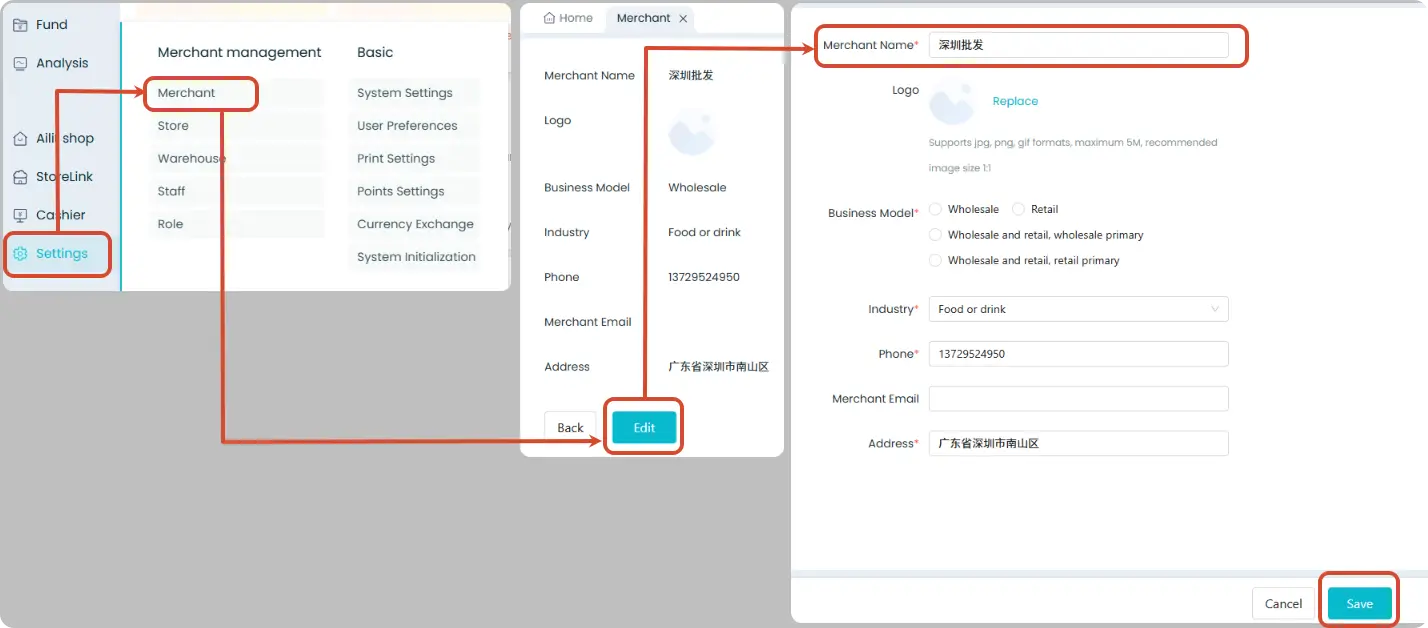
Single-store Version: Set Store Name
Path: [Settings] → [Merchant Information] → [Edit] → Enter new name → Save
After the name is modified, the new name will be automatically applied when printing sales orders.
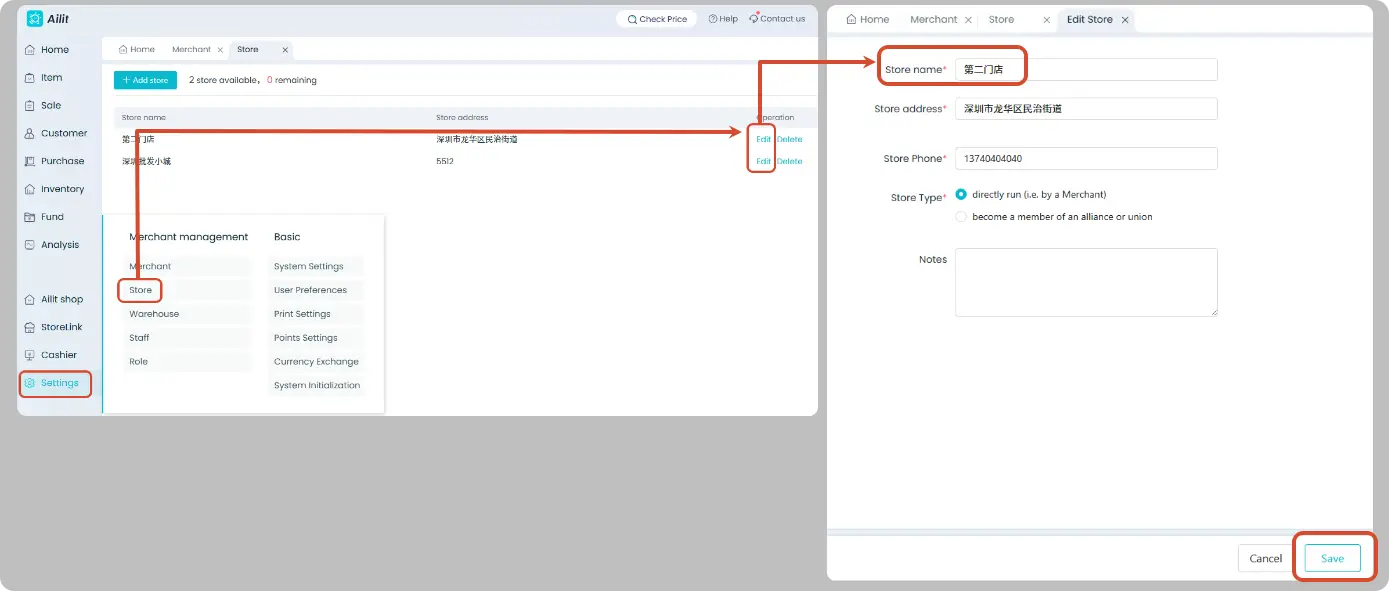
Multi-store Version: Set Name by Store
Users with multi-store enabled can go to
Path: [Settings] → [Store Management] → Locate the target store → [Edit] → Enter store name → Save
After selecting the corresponding store on the sales order, the name set for that store will be automatically used during printing.
💡 Frequently Asked Questions
Modified the store name, but the old name still appears on printouts?
Check whether the "Store Name" in the print template is a system field or manually entered text:
- ✅ System Field (the "Store Name" component dragged from the left panel) → Automatically pull store information with no manual edits required
- ❌ Manually entered text added via custom text boxes → Will not update automatically; delete it and re-add the system field instead.